Warhammer 40K: Darktide Beginner Guide – In this Warhammer 40K: Darktide Beginner Guide, I’m going to share the best tips and tricks that new players should know to help them get started by maximizing the time they have in the game. If you want to find out the specific things to do to make the most out of Darktide, then this guide is for you!
Warhammer 40K: Darktide Beginner Guide
Warhammer 40K: Darktide seems like a straightforward FPS where you hack and slash your way against hordes of Chaos. However, it’s not as simple as it seems since there are nuances and details that you’ll want to keep an eye out for to level up efficiently, collect more coins, and upgrade your gear, to name a few. First up is familiarizing yourself with the role of each class.
Warhammer 40K: Darktide Beginner Guide – Be Familiar with the Role of Each Class
Being familiar with each of the classes will help you understand your role in missions. First is the Ogryn: Skullbreaker, which isn’t your typical tank that simply takes in a ton of damage. This is the ideal support class to try if you intend to control the horde coming at you by charging at them to knock them down. Quite similar to this class in terms of hacking away at enemies is the Zealot: Preacher but rather than being tanky, they excel at dealing greater damage. If you’re looking for a berserker class that deals critical hits and relentlessly charges at elites, then the Zealot should be right up your alley.

Moving away from these two focused melee classes are those who specialize in ranged combat like the Veteran: Sharpshooter and the Psyker: Psykinetic. The Veteran is excellent at instantly identifying special enemies from afar and subsequently taking them down. If needed to perform against hordes of Nurgle’s creatures, they can simply throw in one explosive grenade after the next to eliminate them effectively. Meanwhile, the Psyker deals excellent burst damage by making heads explode. It doesn’t even matter if they’re armored or not, they’re all weak to this class’s manipulation of the Warp. If you want to control your foes while inflicting explosive damage, then the Psyker is the perfect class for you.
Warhammer 40K: Darktide Beginner Guide – How to Level Up Effectively
In Darktide, going for a higher difficulty in missions when your level is low will make it much harder for you to steadily gain experience points. The likelihood of completing the respective mission is going to be small, and you don’t receive nearly as much XP if you fail a mission. To level up effectively from levels 1 to 15, you’ll want to always pick the second difficulty, which is Uprising, together with a Special Condition at least. In some cases, these missions also have a Secondary Objective. Currently, the Special Conditions available in the game are Endless Horde and Power Interruption while the Secondary Objectives will have you collect Grimoires or Scriptures. Completing both of them will reward you with 510 and 340 extra experience points, respectively.

From level 15 onward, I recommend jumping into Malice Missions, which is the third difficulty mode. But note that this is only applicable after grouping up properly since you need to heavily coordinate with one another. You can also opt to just retain the Secondary Objective modifier. Don’t rush into choosing the Special Condition simply to gain more experience because, unlike the Uprising Missions, Malice Missions feature more elites right from the start. You can easily get slaughtered by the horde if you’re not prepared.
Going for the 4th or 5th level of difficulty won’t be worth it either (if you’re trying to level). Given the volume of special monsters you’ll face, the chances of failure would be much higher, making it counterintuitive to level up efficiently.
In terms of mission types, the best ones to pick due to the speed at which you complete them are Assassination, Strike, and then Raid even if you play with a random group and choose a Special Condition. These are pretty straightforward to do, especially Assassination where you’ll simply have to set a Medipack on the ground near the boss you’ve got to kill to stay alive. Meanwhile, Strike will have you and your team follow one set path after the next to destroy all infestations.

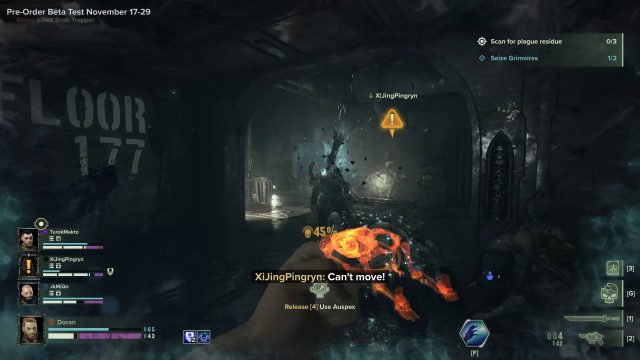
And then finally, the Raid differs a bit depending on the location. In Chasm Logistratum, you all need to approach one side of the area first to get as many supplies ready before moving over to the other side. Comparatively, in the Consignment Yard, you’ll need to deactivate the turrets and then defend your position. The mission you’ll want to avoid the most unless you have a coordinated group is Investigation. What ends up happening here is that random groups divide and conquer to scan plague residue, which is counterintuitive to maintaining Coherency, and therefore Toughness.

Last but not least, vigilantly check the Armoury Exchange for a Curio, which provides a percentage increase in the experience points you get. Even though this is small, it’ll still go a long way to level up a bit faster, especially if you can snag on early on in the game.
Warhammer 40K: Darktide Beginner Guide – Be Aware of Multiple Weak Spots
More often than not, the tendency in shooter games is to aim for the head because this is the target’s primary weak spot. However, in Darktide, multiple enemies will have different armor types, which you can check for yourself over at The Meat Grinder. I’ll talk about the prominent ones that differ depending on the enemy so familiarizing yourself with them will help you to determine the weapons you ought to use.
Most of the regular horde will be Unarmoured and are fairly simple to take down using weapons that deal Cleave damage like the Power Sword. Next are the Maulers who wear Carapace or Plated Helmets and Flak Armour. In this case, you’ll want to attack the Flak Armour, which protects the torso or chest to kill them quickly. What’s effective against both armour types is equipping a weapon with high Penetration to deal significant damage.
Next, you have Unyielding targets corresponding to larger elites like the Bulwark and Reaper who are not susceptible to being staggered simply by knocking them back. So you’ll probably want to hit them with an explosive grenade or choose a weapon that will deal high burst damage such as the Boltgun, and those with the Unyielding percent bonus Blessings or additional passives. And finally, if the enemy isn’t wearing a helmet, then it’s safe to say that they should be attacked at the head.

Understand How Weapon Stats and Upgrading Work
To further understand how weapons work in Darktide, it’s important to pay attention to their base rating, which doesn’t immediately signify the amount of potential damage it can do. Higher isn’t always better in this case. Instead, you can think of it as a summation of that particular weapon’s stats and all of the properties listed in the description. The higher the rating is, the more points are allocated to them. As such, Damage pertains to the approximate overall damage you would deal against a single target.

There are other things to consider depending on usability. If you want to deal as much damage as possible against hordes, then you should choose a weapon with high Cleave Damage and Cleave Targets. These stats dictate the harm you would do in a single swing after hitting the first target together with the number of affected enemies, as a result. Additionally, you should look out for Penetration to determine the effectiveness of damage against armoured foes as well as First Target, which is beneficial against bashing a single elite into bits and pieces.
Do keep in mind that all of the weapons in the game have all of the listed attributes above. When specific stats are displayed, this just means that the weapon has above-average values for it. All melee weapons will cleave, can penetrate armored enemies, and do damage against a first target, for example.

When it comes to upgrading weapons, it always helps to start with a good base. Salvaged or White Items tend to have the best base rating, which correlates to having a higher stat distribution though they lack any useful perks. Now well-rolled White Items can be upgraded by Hadron for Plasteel and Diamantine into higher tiers such as Green, Blue, Purple, and then Orange or Master-Crafted. Upgrading to these tiers will grant minor bonuses and even powerful Blessings.

In the early game, you should hoard these crafting materials that are obtained from missions, since you’ll be replacing your weapons frequently from the Armoury Exchange and the Emperor’s Gifts. Once you reach level 30, only then is it advisable to consecrate or upgrade your gear.
Reserve Ammo for Ranged and Elite Enemies
As the difficulty escalates, ammo becomes scarce so be sure to reserve them for ranged and elite enemies instead of wasting it against regular hordes within your reach. If you can’t target their heads, that’s fine. As long as you shoot their body parts, these ranged enemies will leave their spot to look for another cover, making it the perfect opportunity to perform headshots or shoot them in the chest. During this time, they also won’t shoot you, allowing you to advance.

You’ll then have two options here. You can look for a cover to wait for them to shoot or you can slowly run towards a nearer cover, and if you have enough Toughness left, eventually approach them. Once in the melee range, they’ll stop shooting and switch to using melee weapons so, at this point, you can also swap to your melee weapon to attack them. Your guns will prove effective against elites, especially since you need to keep a safe distance between them to survive longer. If you’re playing as a Veteran: Sharpshooter, you can opt to keep firing from a distance because of your Be Prepared Iconic Feat, which considerably boosts ammo reserves.
Abuse Shove, Knockback, and Block
To maximize your time in the melee range, one tried and tested method is to weave in and out of combat. This style can be done by blocking and then shoving targets as well as dodging backward often during melee attacks. Doing so will ensure that you still deal damage consistently while also protecting yourself and your allies.

Knocking back enemies and blocking their attacks with your melee weapon are the most overpowered actions that you can perform in combat. Knocking back targets creates space between you and your foes, giving you ample breathing room that’s essential in the Horde Mode Special Condition. Regular enemies and lesser foes can be knocked down, allowing you to effectively hack and slash at them. Moreover, elites can also be partially staggered to interrupt their special attacks.
Knockbacks are best executed by Ogryns who gain access to the Slab Shield, which is excellent for crowd control. Meanwhile, it can also give your Veterans and Psykers the space they need to be able to fire at range and utilize the Warp, making them more deadly.
Blocking, on the other hand, prevents taking melee damage as long as you have stamina. It may seem odd at first, but blocking attacks with your melee weapon affects all directions. Yes, that is the entire 360 degrees around your character. Additionally, you’ll be able to auto-block attacks when reviving a downed ally.

This effect automatically triggers as long as you have stamina similar to regular blocks. It’s still a good idea though to clear out the area of hostiles before attempting this, but the move can be executed in clutch moments. Furthermore, however, ranged damage can’t be blocked this way so it can still interrupt the resurrection process.
Stay tuned for more Warhammer 40K: Darktide Guides and be sure to drop by our Twitch Channel if you have questions about the game. What did you think of this Warhammer 40K: Darktide Beginner Guide? Which class will you be playing first? Let us know in the comments below! For other content, check out Frozen Flame Gameplay Overview (Survival RPG) and TRAHA Global MMORPG Gameplay Overview.
Log in to leave a Comment