This Elden Ring Sorcerer Build will help aspiring Mages improve their Intelligence build past level 50, allowing you tackle harder content as a pure magic spellcaster, and giving you the opportunity to use more spells including Glintstone and Gravitational magic.
Ultimate Elden Ring Sorcerer Build
An advancement of the Mage Build showcasing what to use next and where to go in terms of a caster only type of Build around level 50 or so.
- Class: Astrologer or Prisoner
- Flask Spread: Mostly FP some HP
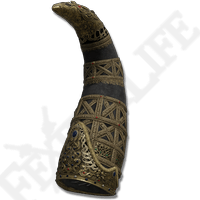
- Weapon: Meteorite Staff
- Shield: Any 100% Physical Block
- Armor: Queen’s Crescent Crown & the heaviest Armor you can wear and still med roll
- Primary Stats: Intelligence & Mind
- Secondary Stats: Vigor & Dexterity
- Spells: Glintstone Pebble, Glintstone Arc, Great Glintstone Shard, Loretta’s Greatbow & Rock Sling
We have over 110 Elden Ring Builds now, for all classes and playstyles. This Sorcerer Build is recommended for intermediate players.
| Beginner Builds | Level 50 Builds | Level 100 Builds | Level 150 Builds | Level 150-200 Builds |
| Mage | Sorcerer | Crystal Mage | Elementalist Meteor Mage | Death Mage |
Elden Ring Sorceror Stats: Intelligence Reigns Supreme
Your attributes or stats are an important part of your build, as their interaction with your equipment scaling will determine your damage output.
Key Points:
- Vigor (20 points): Ensures survivability and reduces the risk of being one-shot by enemies.
- Mind (20 points, recommended increase to 30): Important for FP (mana) pool, with each point beyond 20 offering significant returns.
- Endurance (14 points): Sufficient for carrying capacity and stamina.
- Dexterity (18 points, suggested reduction): Not critical for this build; excess points can be reallocated to more crucial attributes.
- Intelligence (33 points): Primary attribute for a Sorcerer, enhances spell damage and meets requirements for advanced sorceries.
- Survival Strategy: While aiming for high damage, maintaining a balance with health is crucial to withstand unexpected hits.
At around level 50, you should aim to have about 20 Vigor, 20 Mind, 14 Endurance, 18 Dexterity, 33 Intelligence. You probably don’t need that much Dexterity, so if you have like 14, 15, 13, 12 that is fine. You’re not really trying to increase your cast speed much with this build, at least at this point of the game. You want more damage. So, you could probably swap out five points there in Dexterity and put them into Intelligence or Mind, as once you hit 21 onward, you will get more benefits to the tune of almost double the FP per point. So, you really definitely want to get from like 20 to 30 Mind pretty quickly because that’s going to almost double your FP, which is huge. Even though it might not seem like it early on, Mind gets just better and better throughout the game.
We also have 20 Vigor for health, to make sure that we don’t get one-shot. Obviously, you’re not planning on getting hit as a Mage. You could go glass cannon if you want and dump the Vigor and put it into Intelligence so that you’re killing things. But mistakes happen, and you want to make sure that you don’t die from that mistake. As long as you can live and take a flask, that’s good enough. It would be really annoying if you don’t have enough health to survive a lot of one-shot attacks, so we are building a buffer of health. And Intelligence is obviously self-explanatory; it boosts the damage of your spells by increasing your sorcery scaling, and it also is the requirement for a lot of the sorceries in the game. So, you’re gonna need to keep increasing this as much as you can.

Equipment for your Sorceror Build
The first thing we’re going focus on with the Sorcerer build is Staves, specifically which to use. In my opinion, you should already be using the Meteorite Staff. This has S scaling, and the sorcery scaling on this will just continue to do very well the higher your Intelligence goes because of that S scaling. You can’t upgrade this weapon, but you don’t need to; it does very well until late game. If you’ve been using the Demi-Human Queen Staff, or if you’re using the Academy Glintstone Staff, or some other staff at this point in the game, you should switch over to Meteorite. The Meteorite Staff will carry you until you can use the better staves, which will outperform this staff. There’s really no reason to use anything else so, if you don’t have it, go ahead and get it as quickly as you can: it’s picked up in Caelid here.
Key Recommendations for Staves:
- Meteorite Staff: Highly recommended for its S scaling in Sorcery, making it a superior choice as your Intelligence grows. It cannot be upgraded, but its performance remains strong up until later into the game.
- Alternative Choices: While the Demi-Human Queen Staff and the Academy Glintstone Staff are common early picks, switching to the Meteorite Staff as soon as possible is advised due to its superior scaling and effectiveness.
- Sorcery Scaling Importance: The effectiveness of a staff is primarily determined by its sorcery scaling, which should ideally be S class for maximum efficiency. This scaling improves as your Intelligence increases, enhancing your spell damage.
- Specialized Staves: For those utilizing specific sorcery schools, like Carian Sorceries, consider staves that boost these particular types of magic for increased effectiveness. However, for a general build, Meteorite remains the best until high-level spells are unlocked.

Maximize Sorcery Scaling
All we’re really concerned with, on the staff for the most part, is the Sorcery Scaling. This is the number on the staff that increases with your Intelligence. So, the more Intelligence or less Intelligence you have, the more this is going to change. And the better scaling you have on a staff, the more this number will increase or decrease depending on what your Intelligence is. Meteorite Staff has S scaling, so that’s top tier; you don’t really get much better than that until late game. As you upgrade some of the other stats in the game they will eventually get to S tier, and they may outperform the Meteorite Staff, but it’s going to be a long time before they get there.
There are other passive bonuses; for instance, like the Meteorite Staff boosts Gravity Sorceries. So, the Rock Sling spell, which you use with this build, is going to be boosted additionally on top of that sorcery scaling, making this staff better for that spell than maybe some other staff that has the same sorcery scaling at its upgrade.
And there are other Staves as well that have bonuses to certain sorcery groups. So, if you find yourself using a particular group of Sorceries, like the Carian Sorceries, there’s a staff that boosts those specifically. So, if you end up getting it to the same sorcery scaling as Meteorite Staff, it’s actually going to outperform those. With this build, though, we’ve used spells from all different schools, and we use Rock Sling, so Meteorite is the best choice until you get to the very high Intelligence requirement spells.
As I mentioned, a lot of playing a Mage is trying to figure out how much FP it’s going to cost you to defeat an enemy type, and you’ll learn this as you play the game and as you upgrade your spells. But you want to try and use the minimum amount of FP to kill enemies as possible so that you’re not overkilling them with so much FP that you’re constantly out of FP. You’re obviously going to have your flasks skewed towards the FP side of things, not the health side of things, to give you an opportunity to replenish FP more easily. So, there’s some math involved here, and you kind of adapt as you go. But learning to figure out how much FP you can kill an enemy with the least is a big part of playing a Mage build in Elden Ring.
Picking Talismans and Armor
Prioritize enhancing spell effectiveness but keep an eye on your survivability. Your aim should be to balance offensive and defensive boosts so you can tackle any challenge.
Recommended Talismans and Their Benefits:
- Graven-School Talisman: Slightly increases sorcery damage, enhancing overall spell effectiveness.
- Radagon Icon: Speeds up spellcasting, crucial for quick reactions and chaining spells in combat.
- Blessed Dew Talisman: Provides gradual health regeneration, ideal for long explorations and saving healing flasks for critical moments.
For those looking for an alternative boost, the Marika’s Scar Seal enhances Mind and Intelligence, increasing both FP and spell damage but at the cost of increased damage taken.
Optimal Armor Choices:
- Queen’s Crescent Crown: Boosts Intelligence by three, offering a significant increase in spell potency without the health or stamina penalties common to other headgear.
- Armor Selection: Aim for the heaviest armor possible without hindering medium roll, balancing protection with mobility. The Carian Knight set is a good example, offering decent protection while fitting the aesthetic of a Sorcerer.
The three talismans you want for this build are the Graven-School Talisman, the Radagon Icon, and the Blessed Dew Talisman. The Graven-School Talisman boosts the damage of your sorceries by a small percentage. It’s not very much, but every little bit helps. And Radagon Icon is used to increase the speed at which you cast spells, which is especially useful when you’re spamming spells. The other talisman I like for this part of the game is the Blessed Dew Talisman. This slowly regenerates your health over time. It’s not very good for boss fights, but it’s excellent for exploration, particularly when you’re loaded up on the FP side of things, flask-wise, and you take a little bit of damage, and you’re like, “Should I drink a potion and waste one of the few that I have so that I don’t get one-shot like randomly out of nowhere by something? Or should I wait and hope I don’t get one-shot?”
Another decent choice for this Build, if you don’t want that, is the Marika’s Scar Seal. This talisman increases your Mind, Intelligence, Faith, and Arcane. You don’t really need the Faith and Arcane, but the Mind and Intelligence is nice from it to give you some more FP and to give you a little bit more damage. You do take more damage from wearing it; it’s not a lot, but it’s also a good option if you just want to try and get a little bit more damage out and you’re not so worried about healing yourself.
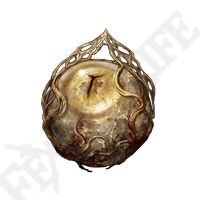
In terms of armor, I really like the Queen’s Crescent Crown. It increases your Intelligence by three. It’s pretty lightweight, doesn’t have any downsides like some of the others that reduce your health by a lot or your stamina by a lot in order to increase your Intelligence. I really don’t like that because you’re already going to be low on HP anyway because you’re playing a Mage and you’re not trying to get hit. Even though we do boost Vigor, and so reducing that even further puts you kind of in the one-shot territory where you might get one-shot by some of the boss attacks, and you really don’t want to be in that range. And as far as the rest of the armor goes, I just like to wear the heaviest I can wear and still medium roll to get as much protection as possible. The Carian Knight set’s kind of nice but you can use whatever you feel like here.
Sorceror Build Spells Guide
Integrating these spells into your Sorcerer’s arsenal, and you can effectively tackle a wide range of combat situations, from crowd control to single-target engagements, ensuring your survival and success.
Key Spells and Their Uses:
- Glintstone Pebble: A staple for its low FP cost and good range, ideal for consistent damage output throughout the game.
- Great Glintstone Shard: Best used against aggressive enemies due to its higher FP cost but substantial damage, particularly effective in close encounters.
- Glintstone Arc: A situational AOE spell that shines against groups of enemies, passing through multiple targets and expanding its damage radius.
- Rock Sling: Highly effective against magic-resistant foes, offering physical damage as a complement to your sorcery arsenal. Especially useful in the Rennala fight and areas like Limgrave and the Lakes.
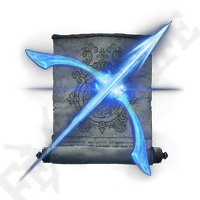
- Loretta’s Greatbow: Offers immense range and solid damage, perfect for engaging enemies from a distance or in open landscapes.
The first spell you will need is Glintstone Pebble. You should have been using this from the beginning of the game. What’s great about this spell is it’s cheap, and it has very good range, and it can be spammed. You’re going to use this spell through the first half of the game. And I’m sorry to disappoint you if you’ve been playing a Mage and you’re like wondering how much variety you get, you’ll be sad to learn that throughout the whole course of the game, you’ll probably use this spell more than any other single spell in the game. And it just has so much application because of its range and its low cost that it’s very, very good.
The next spell that I like for this build, very, very situational, is Great Glintstone Shard. And the reason it’s very situational is it has a higher FP cost, even though its damage is more substantial than Glintstone Pebble. What I like using this spell for is very aggressive enemies, particularly ones that try to get to you and melee very quickly, and that don’t dodge. This is a better way of getting damage out faster than spamming Glintstone Pebble when things are charging you because you’re doing about double the damage, maybe not exactly double, but about 70 to 80 percent more damage than a Glintstone Pebble, and you can cast them at almost the same speed as Glintstone Pebble. So, if you need to get damage out quickly because something’s charging at you in your face, then Great Glintstone Shard is the way to go.
The next spell is Glintstone Arc. Again, you’ve probably been using this since the beginning of the game. Another very situational spell that’s very good at clearing enemies. You don’t have a lot of AOE with the way we’re set up. This is a very good AOE spell for packs of enemies. There are parts of the games that are like clusters of enemies, and this passes through enemies. So, it doesn’t just hit the first one and stop; it goes through the whole pack and it spreads out. So, it’s very, very nice in those situations, and you’ll be glad you have it slotted when those situations arise.
The next spell we use for this build is called Rock Sling. You can get this from Caelid. It’s very, very easy to get. And this spell actually does physical damage. And that’s fantastic because there are a lot of enemies, particularly in the Limgrave and the Lakes area, that are magic resistant. And this allows us to deal substantial damage to those enemies where we might have a harder time with Glintstone Pebble, or you know, another spell that does magic damage. So, you definitely want this. It’s very, very good in the Rennala fight. It’s also further boosted by the Meteorite Staff, which works really well with this as well.
And the last spell we use here is Loretta’s Greatbow. This thing has tremendous range and pretty good damage. You can absolutely cheese just tons of enemies, particularly out on the landscape with this spell, where you just stand like right outside their aggro range and wait for them to retreat and keep spamming it. So, if you’re having a hard time with some of the bosses on the landscape, this can be a game-changer for you. And if you’re in, you know, a Legacy Dungeon, and you need to get something that’s sniping you or very, very far away, it’s really good.
We have more builds coming for Elden Ring and Shadow of the Erdtree. If you need help finding items, make sure to check the Elden Ring Map.
Log in to leave a Comment