September is here, and that means that Monster Hunter World: Iceborne has finally arrived, well for console anyway. And with its arrival will undoubtedly come a slew of new players looking to make their Hunter mark, and who will also have many many questions about the game’s mechanics. Monster Hunter World is very deep with regards to this aspect, and their is a lot to learn, so in this article we’re going to cover things for those that are just starting out. If you are new to Monster Hunter World, or you’ve just forgotten what it was like to be a greenhorn and would like some perspective, this Guide is for you.
Monster Hunter World Iceborne: Beginner Guide (21 Tips for New Players)
Since there are so many things to learn in Monster Hunter World: Iceborne, it’s very difficult to choose just where to begin, but I think the safest place is with how to Hunt effectively. In order to do this, there are many concepts you need to understand, so we’ll cover these first. Let’s begin with Food.

1. Make Sure You Eat Food
Some people will laugh that I started here, but it’s easy to forget to get into a habit of doing this, and it can make things considerably more difficult. Reinforcing this is the fact that many early game Monsters are ridiculously easy, helping facilitate the creation of bad habits, because you simply don’t need to eat to defeat them. Always eat before heading out on the trail of a Monster, and an even better idea is to eat food in town, in case you get dropped near the Monster when you load in, which can sometimes happen. You can pay with Points or Money, whichever you have more of, but it’s probably best to use Points early on, and switch to Money later when you have less need of it. The Chef’s Choice Platter is ideal because it boosts Health as well as Stamina.

2. Always Loot the Supply Chest
Every time you head out on a Hunt Quest the Supply Chest will have useful things, such as Potions, Rations and Traps. These will not carry over from Hunt to Hunt, so be sure to pick them up and use them first if possible when needed. This will save valuable Potions and Traps, until you gain more Materials to make them, and this becomes irrelevant. Still it’s a good habit to have, and will save you some farming in the long run. Note that these supplies will not be present on Expeditions, so if you don’t see any, then that is why.

3. Look At The Left Side of the Screen
When out on the trail of a Monster one of the best ways you can find tracks, if you are having a hard time, is by looking at the left side of the screen. When you are near things they will display here, and you can use this to effectively narrow down where to find said tracks (or other things), which can save you quite a bit of time. Be sure to look here often and use it as a guide until you get a better sense of how tracking works, it’s a good way to find things that you’ve never seen before, so are harder to spot.
4. Don’t Forget to Sharpen Your Weapon
If you’re having difficulty with the Monster you are facing, make sure that your Weapon is always as sharp as possible. You will deal improved damage when it’s in tip top shape, which can speed things up, and you may find your attacks bounce off the Monster if you don’t do this. It can be tedious, but always take the time to do it, using the Whetstone in your inventory menu. If you find it’s bothering you too much, try to craft a Weapon with higher Sharpness. This will allow you to do this less often.

5. Don’t Be Afraid to Resupply
As you progress the game and Monsters become more difficult, you may find yourself in the situation that you have no more Healing Potions, or other items that are vital to success. If you’re like me, you probably have a tendency to YOLO it anyway, and hope things work out for the best. However, you can open your World Map and return to any Camp, and head into the tent and restock on these before heading back out to face the Monster (you can even craft more if you’re out). This is a great way to ensure victory, and you will find you need to do this more and more as the game goes on, so there is no shame in it. You can use a Farcaster to return mid combat if necessary.
6. Max Potions Are Your Friend
It will not be uncommon for you to Faint once you starting getting into the more challenging Monsters, and when this happens you will lose your Food buff. This will reduce your Max Health and Stamina, and sometimes you cannot eat again immediately. In this case you can increase your Max Health again by consuming a Max Potion, and these are craftable in your Inventory menu while inside the Tent or in town. Don’t worry about carrying these with you, just have them in your box for when you need them.
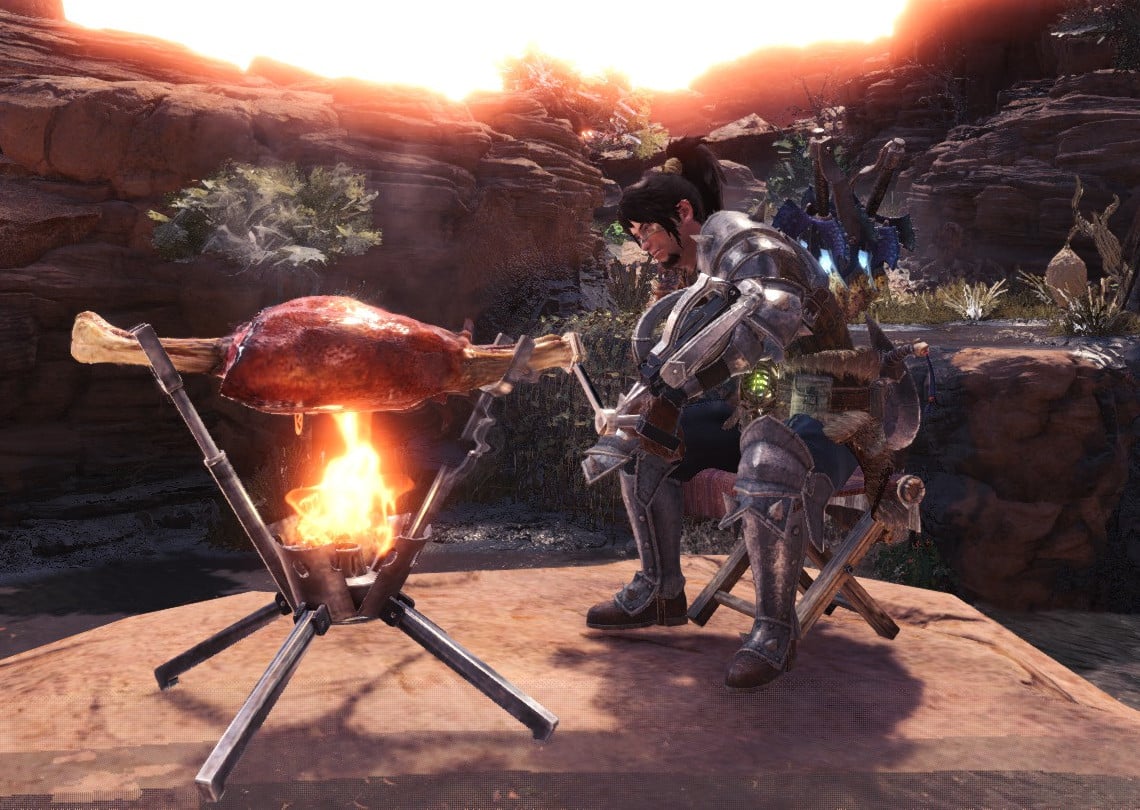
7. Rations & What They Are For
Rations will be given in the Supply Box when on a Quest, and can be consumed to recover Max Stamina. As you face Monsters out in the wild, your Max Stamina will deplete over time and you will need to ingest these to raise it up again. Some times you will need to eat more than one, so don’t be afraid to do so. If you are on an Expedition, these will not be in the Box, so in order to replenish Max Stamina you will need to cook your own. To do this, slay some non predator monsters, Carve them and use your BBQ Spit to roast their meat. Then consume the result to replenish Max Stamina.
8. Trap Monsters Instead of Killing Them
While I can certainly empathize with the inclination to kill Monsters, particularly those that have been owing your ass all over the landscape, Capturing them yields more materials and is faster. For these reasons it is always best to Trap them if you can, as it will save you time in the long run.

In order to Trap a Monster you need to deal enough damage to it that it has a flashing white skull on your Minimap, and it will generally be limping when it runs away. If you see it limping follow it, and wait until it is asleep if you can. Place a Shock Trap or a Pitfall Trap next to it and then quickly hit it with 2 Tranq Bombs in order to capture. If for some reason you mess this up, simply place another Trap and Tranq it again and you should be fine.
9. Manage Your Inventory Between Quests
One thing you need to get used to doing is managing your Inventory in between Hunts, because otherwise you will quickly find you have tons of things you don’t need and not enough of the things you do. Head to the Item Box and move over every Material that you’ve gathered to the Box and move to your Pouch more Potions and other utility Items (such as traps) that you may need for your next Hunt. It’s embarrassing joining a Hunt with other players and not being prepared, so try to stay on top of it, and create a habit of doing this each time.
10. Grow Honey to Create Mega Potions
You may find early on that you have plenty of Potions, but not many Mega Potions. This is because you need Honey in order to make them, and there isn’t exactly an abundance of it every where. And unless you want to spend some time farming it, which I’m assuming you don’t, then you’ll have to come up with a better solution.

Thankfully you can grow Honey while you’re out Questing by Cultivating it at Botanical Research. Make sure to empty this as your box gets full so that you don’t waste potential Items, and use it to make lots of Mega Potions early on. Later in the game you probably won’t need to grow Honey, but it’s a good way to stay stocked up when you’re just starting out.
11. Tailrider Safari
Once you unlock the Research Base by progressing the story, you will be able to speak to your Housekeeper and send out a Tailrider Safari to gather Materials for you at the cost of Research Points. It’s a great way to use these, and it will net you a lot of Materials over the course of the game, so make sure to pick up your Materials from them when they return and send them back out again. Don’t waste time they could be gathering, by leaving them returned and not doing anything!

12. Speak With NPCs After Finishing Quests
Often times after you complete a Quest in Monster Hunter World, you’ll unlock new ones that can be picked up by speaking with NPCs that have an “!” over their heads. Be sure to look around, because NPCs are spread out all over Astera, and it can be hard to see them.
Quests yield more Materials than Expeditions, so it’s a good idea unlock as many as you can, because you can always repeat Optional ones again and again for improved odds of getting the parts you need. Additionally, these Quests often give you new Equipment or upgrade existing Equipment, such as Mantles, so you don’t want to miss out.
13. SOS Flares & When to Use Them
Many Quests in Monster Hunter World, particularly those Assigned to you, cannot be Co Oped until you’ve triggered a cutscene. Once you’ve done this, you’ll get a message on the screen notifying you that you can now SOS, allowing others to join your game.
If you don’t want to SOS, you can always “Return From Quest” and then queue up fresh from the Quest Board with your group. A good way to tell if you can’t have other players in your Quest yet is by the objective. If it doesn’t say “Hunt a [name of Monster]” then you likely need to do something first before you can.
14. Early Game Armor and What to Focus On
When trying to figure out what Armor to use early on, it’s best to look at Monster Hunter World Iceborne like an MMO. You’re not going to be wearing it all that long, so there’s not much point in min/maxing it. The general consensus is that increasing your Defense should be your primary focus, as this helps keep you alive when learning the attacks of harder Monsters. Health Boost is also a nice Skill to have on Armor, as it allows you to take more hits. Don’t worry too much about it, just be sure to pick Armor with good Defense until you hit Master Rank.

15. Set Your Decorations Before Your Hunt
Decorations can be slotted into your Armor and Weapons at any time before you leave Astera or Seliana, but you cannot change them during Expeditions, Quests or Investigations. Since these can be changed as many times as you’d like, it’s always a smart idea to change them to what you’ll be facing next. For instance, if you’re fighting a monster with Poison, then maybe you want to set some Decorations that give Poison Resistance to help with this. It takes but a minute and can make things markedly easier for you, and you can do this infinite times.
16. Radial Menu and How to Use It
One thing you’re going to eventually want to setup is your Radial Menu. This will allow you to use items much more easily and quickly, which can be the difference between Fainting or not in combat. In order to do this head to Options and select “Customize Radial Menu”. From there you can slot whatever you wish into Shortcuts 1 and 2. You really only need to do this for Questing, but you can setup Emotes for when you are in Astera.

While out Questing you will use the Radial Menu by pressing and holding L1 and then hitting “Up” or “Down” on the D-pad, and then pressing the right stick in the direction of the thing you wish to use and then letting go of the right stick. It can be tricky to get used to, and it will undoubtedly get you killed a few times when first learning it, but much like other habits in the game, it’s worth taking the time to do. Start with a few things, and add more as you become more accustomed to it.
17. Palico Gadgets and Equipment
Palicos don’t gain new Equipment as the game progresses unless you provide it to them. Be sure to make them new Armor and Weapons periodically so they are more effective, and it only costs a very small amount of materials to do so.

Also, take the time to find all of the Palico Gadgets in Monster Hunter World: Iceborne as they will help dramatically. These can be acquired by speaking with the Grimalkynes on each Map and doing the things they ask of you. You can use the Wiki to find out how to do this, and it’s good to do early on, as Gadgets get stronger as they are used, and it takes a long time to max them out. You don’t want to get to end game with weak Palicos, so start early.
18. Tailrider Unity
When playing solo you can have your Palico recruit local Grimalkyne tribes to help you in combat, which will raise your Tailrider Unity. The higher your Tailrider Unity for each zone, the more the Grimalkyne will help and the higher Health it will have. Additionally, if you raise it high enough in a particular zone, you will be able to trade with them for some Items and Treasure Maps.
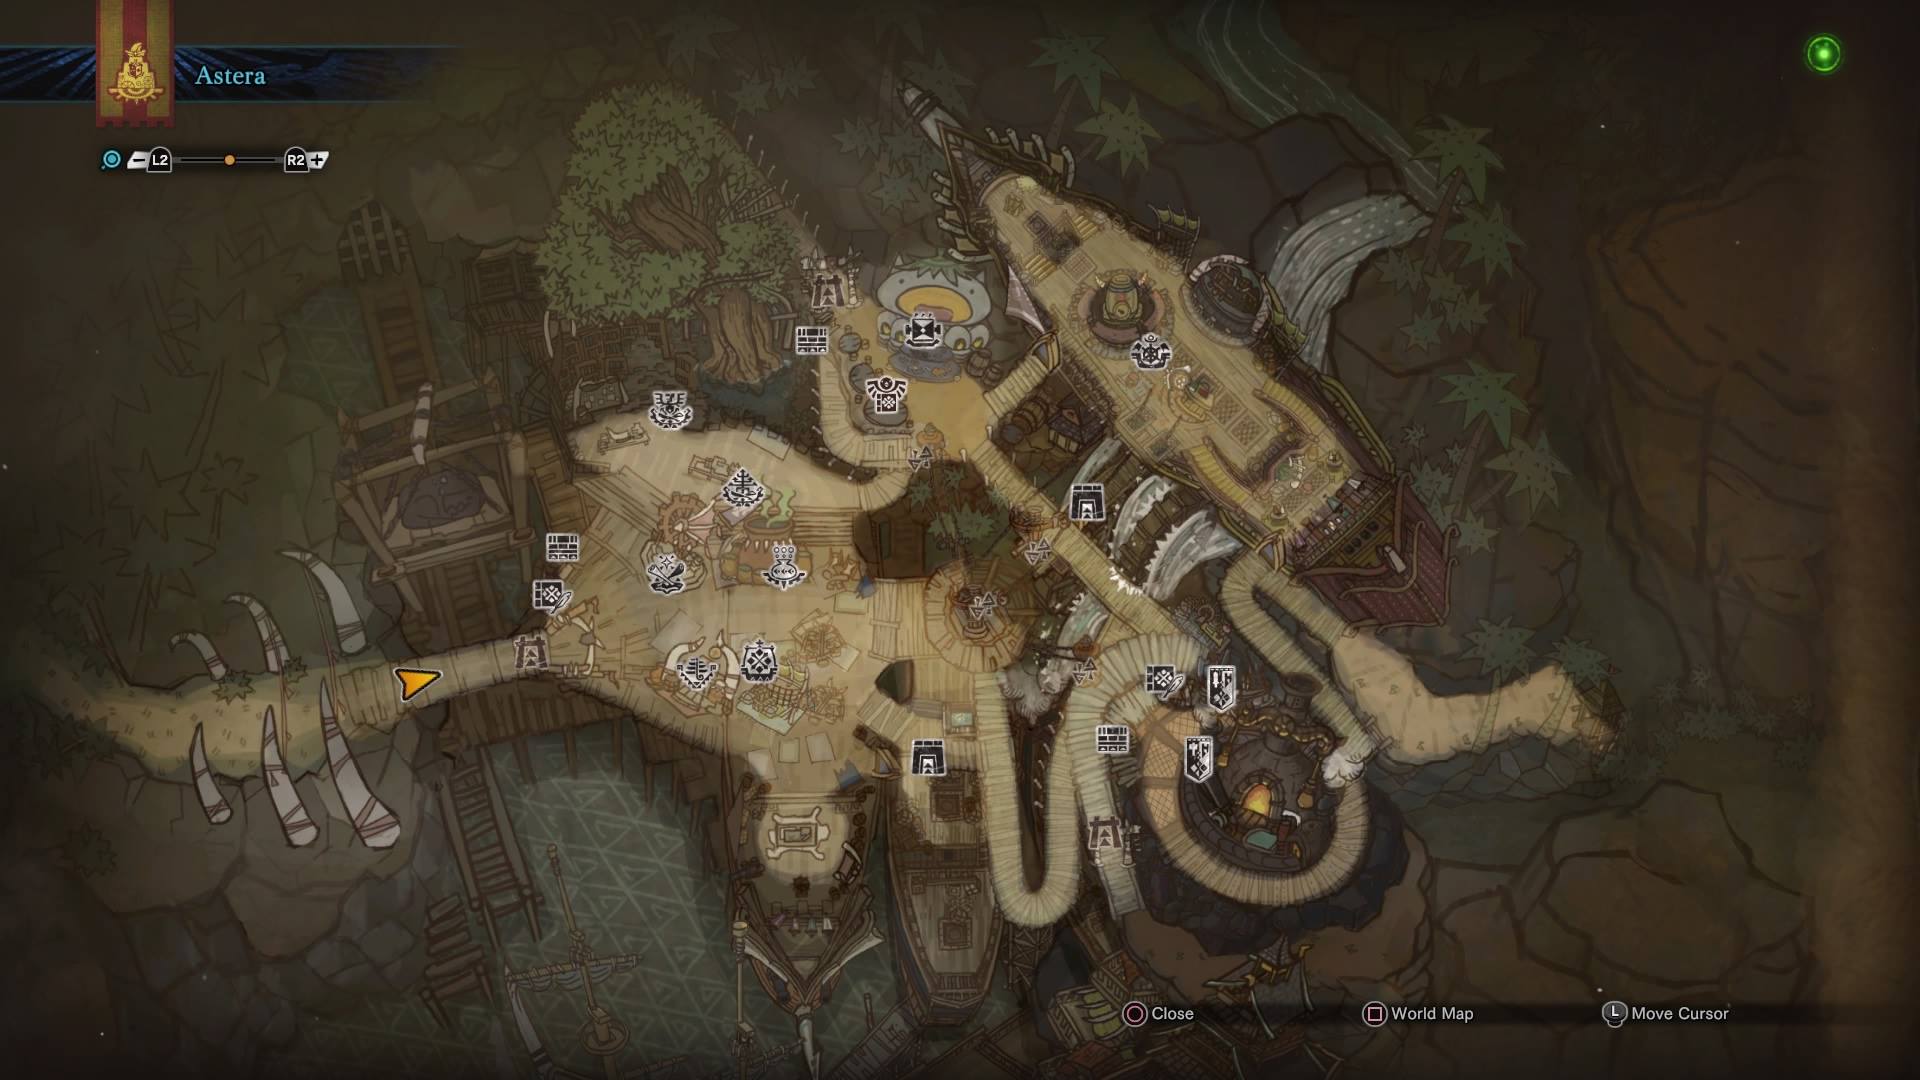
19. Reading the Map
One particularly difficult thing to do as a new player is look at a Map and see just exactly what you are looking for. Maybe you want to farm some Bonepiles or Ore, or maybe some Spider Webs for some Traps. It’s hard weeding through everything when you aren’t sure what to look for, so a good way to help narrow things down is by using “R1” on the Map screen. This sorts things into type, so you can hone in on what it is you need. You won’t need it all that often, but it really helps when you do.
20. Learn Monster Spawns
Generally most Monsters will spawn in the same area of each map, whenever you go there. By learning the Map and where this is for each Monster, you can save yourself a lot of time when farming them, because running around not fighting isn’t very helpful. When fighting a Monster the first time, try to make a mental note of where you saw it, because you will undoubtedly face it again later. This way you can load into the most appropriate Camp, and get there much more quickly.
21. Use the Wiki
Lastly, the Wiki is a great resource for finding out where to get certain Materials for that Weapon or Armor you are trying to Forge, and what the best way to go about getting them is. Additionally, it allows you to see what Monsters are weak to on the fly, without having to pull up your Field Guide and scroll through. The easiest way to do this is just go to Google, type in the Monster name, and you’ll be get the information you need in no time. There are two dozen new Monsters in Monster Hunter World: Iceborne, so you’ll definitely want to do this!
Stay tuned for more Monster Hunter World Iceborne content as we cover The Guilding Lands and get into some Builds. Be sure to also check out our thoughts on the expansion, in our Monster Hunter World: Iceborne Review!
If you are looking for more Monster Hunter World info, you can go in-depth with our featured guides: All Armor Limits, Long Sword Elemental Limits, Autumn Harvest Festival, Dual Blades’ Max Element & Status Limits, Attack Values & You, Crown Sizes & You, Monster Hunter World: The Canteen Explained With Ingredient Guide or Monster Hunter World: End Game Guide.
If you are interested in Monster Hunter World longsword builds, you can peer into them at: Kaiser Gamma, Drachen Alpha, Kaiser γ vs Drachen, Dragon Longsword Build, Raw DPS Build, and Elemental Crit Build For Sealed Weapons.
There are several more MHW guides that you don’t want to miss out on! Be sure to check out the Monster Hunter World Iceborne wiki as it will contain all the latest info as it releases.
Log in to leave a Comment